Allotment Plot Management Basics
Learn how to organize your allotment space, plan crop rotation, and maintain soil fertility across multiple growing seasons.
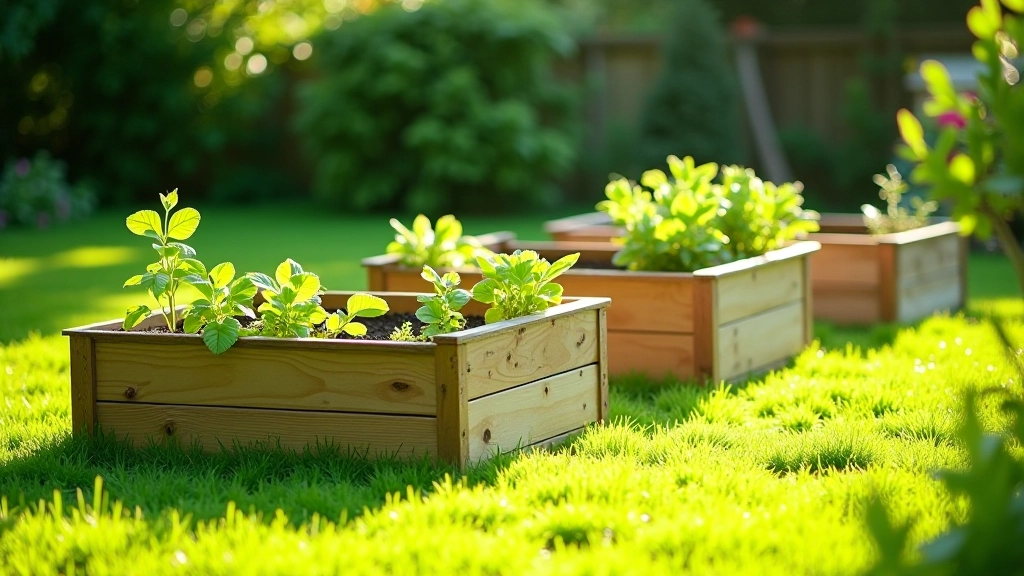
There's something genuinely satisfying about building your own raised bed. You're not just creating a planter — you're building a small ecosystem that'll give you better drainage, warmer soil in spring, and easier access to your plants. It's the difference between fighting your garden and working with it.
We've built dozens of these over the years, and the good news is straightforward: it's not complicated. You'll need basic materials, a bit of space, and about a Saturday afternoon. Let's walk through exactly how to do it properly.
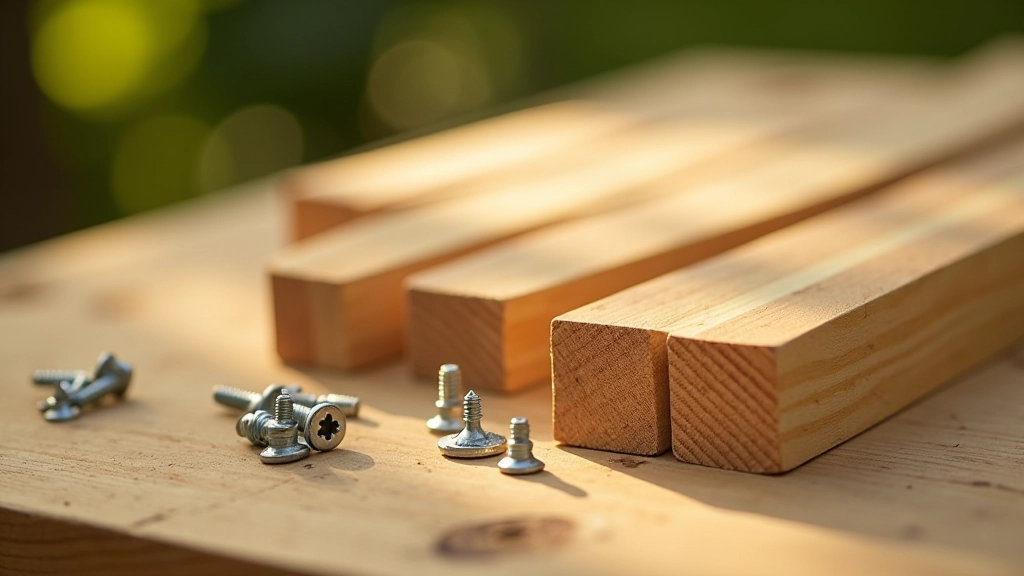
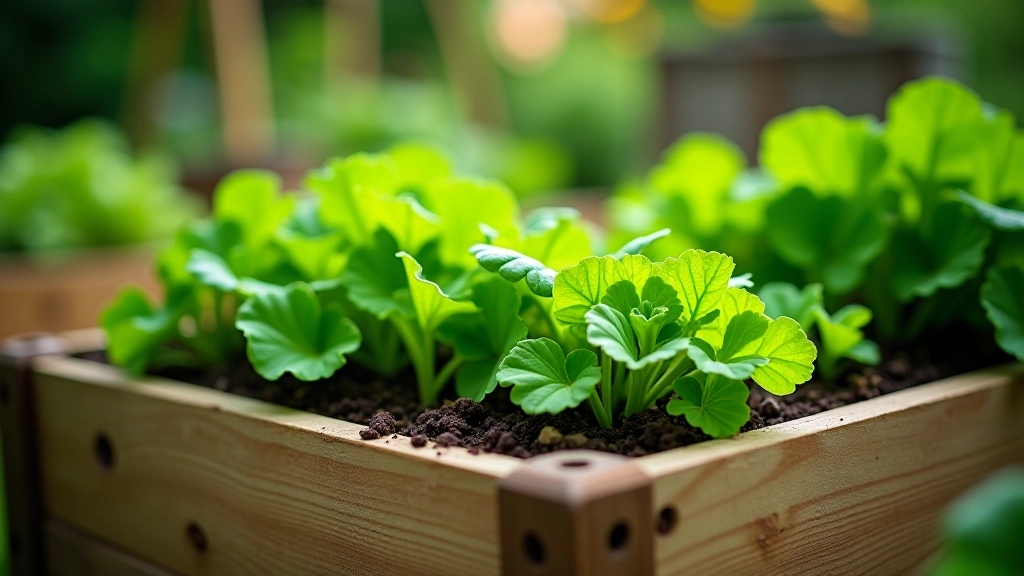
Before you start, gather your materials. The most important thing: don't use treated wood with chemicals. You're growing food, not building a fence.
Four boards of untreated cedar, redwood, or oak. Standard size: 2 inches thick, 12 inches tall (though you can go taller). For a 4x8 foot bed, you'll need two 8-foot boards and two 4-foot boards.
Corner brackets (four of them) and 3-inch screws. Galvanized or stainless steel work best — they won't rust and leach into your soil. Skip the nails; screws hold better and last longer.
A drill with a screwdriver bit, a level, and a measuring tape. That's honestly it. You don't need a saw if you have the timber yard cut your boards to length.
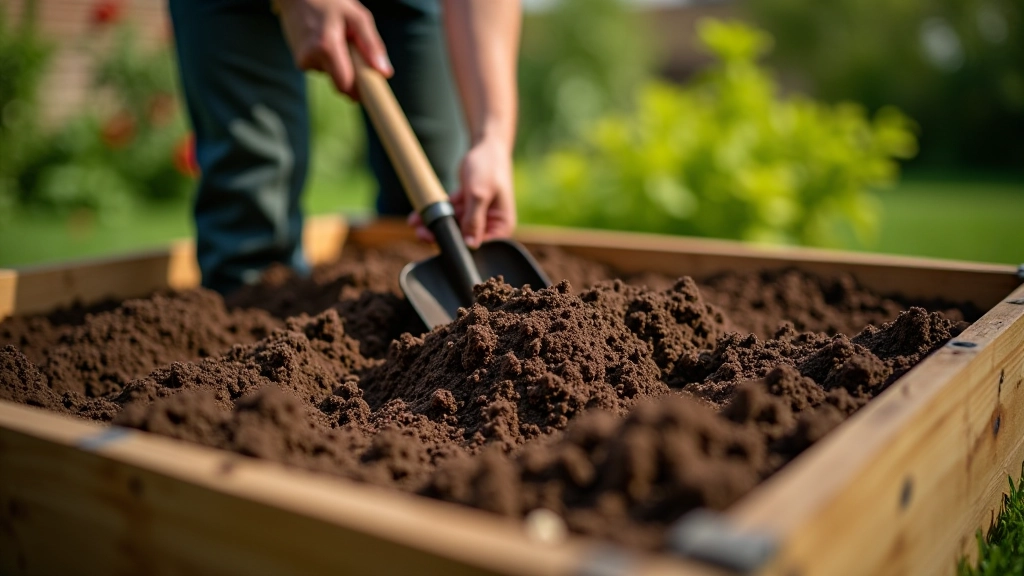
A 4x8 foot bed, 12 inches deep, needs roughly 32 cubic feet of soil. Most people fill it with a mix: cardboard on the bottom to suppress weeds, then layers of compost, topsoil, and aged manure.
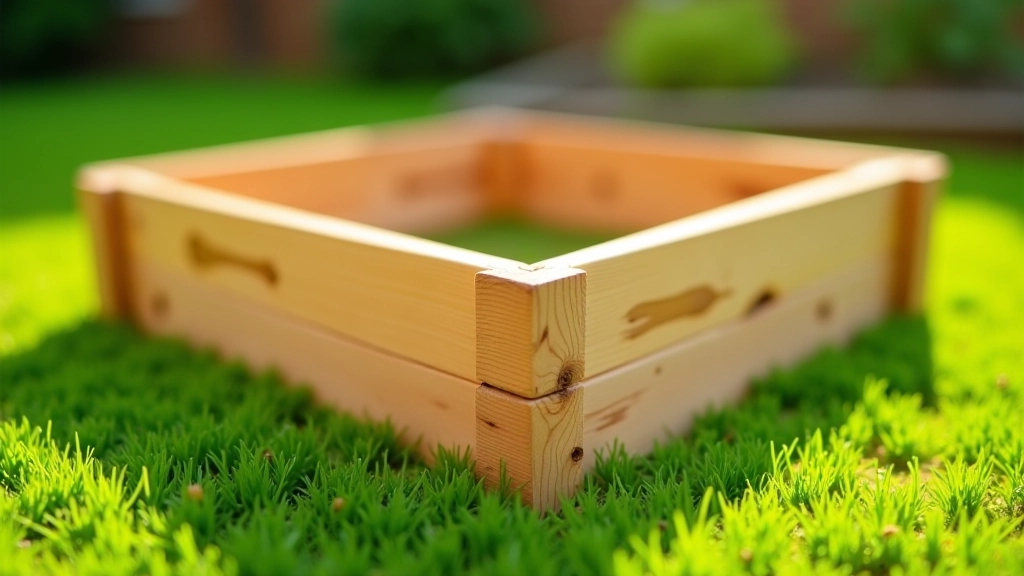
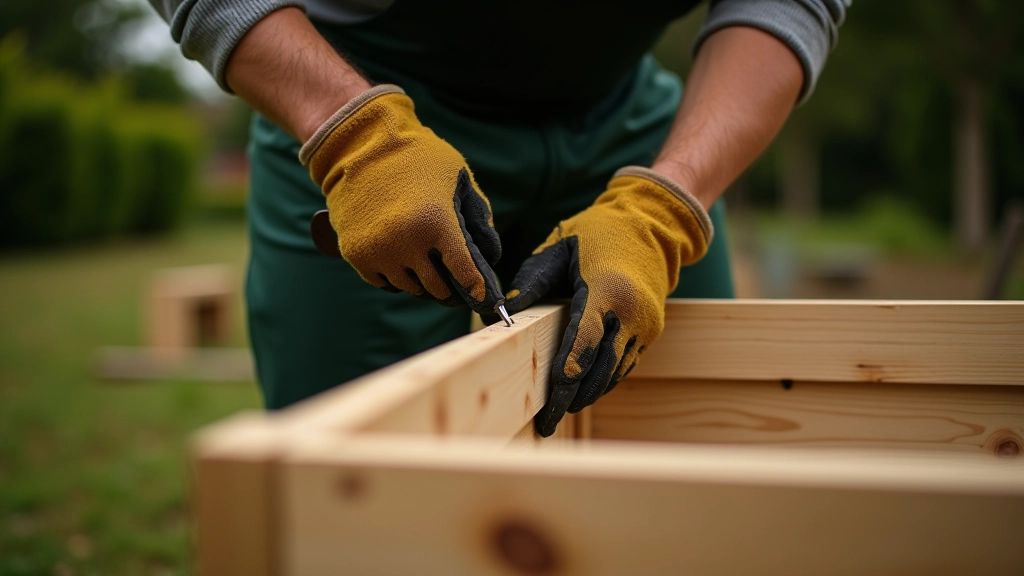
The actual assembly is straightforward. Lay your boards in a rectangle where you want the bed. Attach the corners with brackets and screws — three screws per bracket works well.
Lay out your four boards in a rectangle. Use a level to check it's roughly even. Don't stress about perfect level — minor slopes are fine. Soil settles anyway.
Place a corner bracket on the inside corner of each joint. Drill your first screw to hold it, then add the other two. You'll want a battery drill — hand screwing three screws per corner gets tedious fast.
Step back. Is it square-ish? Is it sitting on level ground? Good. If one corner is higher, you can dig out a bit of soil underneath to compensate. This doesn't need to be perfect.
This is where most people get it wrong. They just dump in topsoil and wonder why vegetables struggle. The soil matters enormously.
Start with cardboard or newspaper on the bottom — this suppresses weeds without chemicals. Then layer it up. A lot of gardeners use the "lasagna method": alternating layers of compost and aged manure. You'll want at least 10-12 inches of quality growing soil.
Most vegetables need 8-12 inches of soil. Root crops like carrots and parsnips want the deeper end. Leafy greens are happy with 8 inches. If you're doing tomatoes or squash, aim for 12 inches minimum.
Don't use pure compost — it'll compact and drain poorly. Mix in about 30% aged manure or well-rotted compost, 40% topsoil, and 30% peat-free multipurpose compost. Your plants'll thank you within weeks.
Where you put your bed matters as much as how you build it. Most vegetables want at least 6-8 hours of direct sunlight daily. That's non-negotiable.
Position it away from trees — falling leaves become pest habitat, and tree roots will eventually compete with your plants. Make sure water can drain away properly. If your garden floods in heavy rain, raised beds won't fix that problem completely, but they'll help.
Consider access too. You'll be watering, weeding, and harvesting regularly. Put the bed somewhere you can comfortably reach from the sides. If you make it more than 4 feet wide, you'll struggle to reach the middle.
One more thing: don't position it right against a fence or wall. You'll want air circulation, and you'll need to get behind it eventually for maintenance.
This guide is educational and intended to help you understand the fundamentals of raised bed construction. Specific results depend on your climate, soil type, local water availability, and gardening experience. Consult your local RHS office or gardening extension for guidance tailored to your region's hardiness zones and seasonal conditions.
That's genuinely it. You've got a solid raised bed that'll produce vegetables for years. Most cedar beds last 8-10 years before they need replacing. Some last longer.
The first season, don't expect perfection. You'll learn what works in your specific spot. Soil will settle. You'll figure out watering. By year two, you'll wonder why you didn't do this sooner.
Start with one bed. See how it goes. Once you've built one, building a second takes half the time because you've already learned what works. Most gardeners end up with three or four before they know it.